Friday, December 9, 2011

A simple tradition.


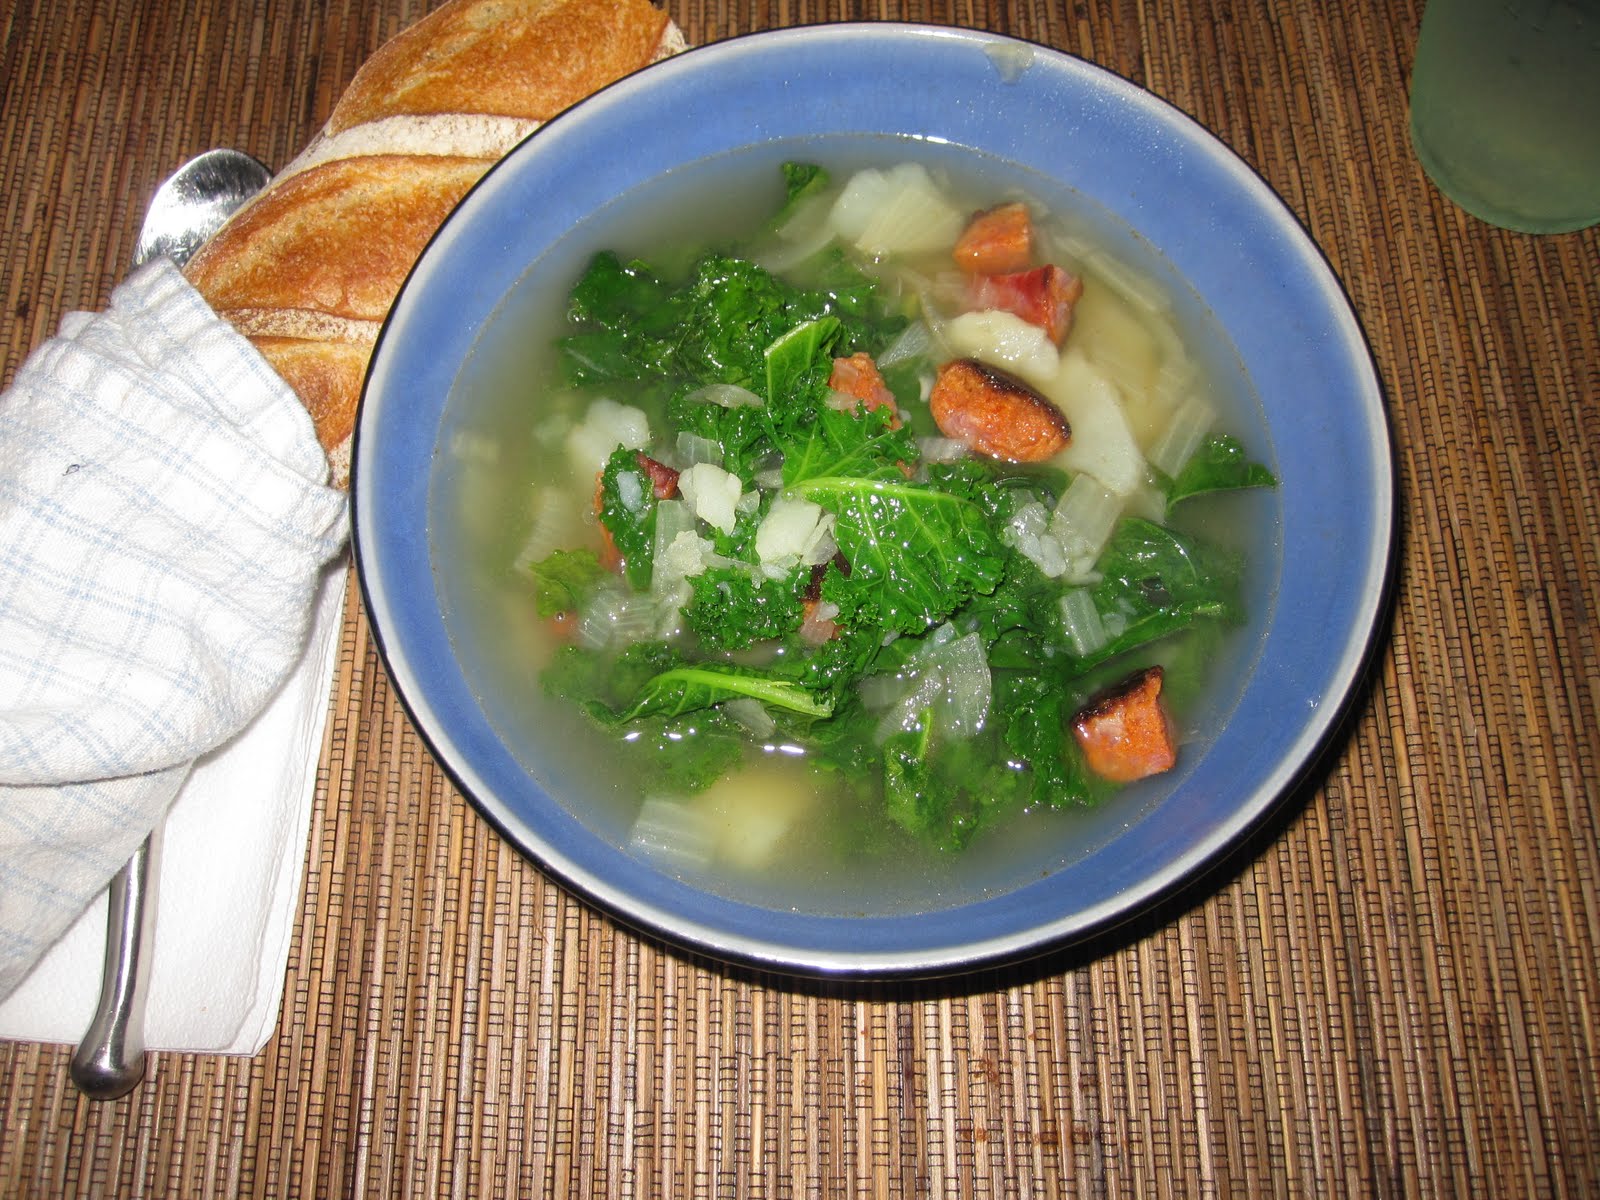
Hearty meal season is upon us, and with that I bring you beef stew. My fiance and I pick up our Christmas tree during the first weekend of December, and though there are sappy fingers, needle-covered floors and a LOT of lugging involved (for him), the spirit-warming results are always worth it. We decorate the tree with an ever-growing hodgepodge of ornaments, and light a fire and watch Home Alone or National Lampoon’s Christmas Vacation. It’s a simple tradition, but we look forward to it all year. And now that we’re engaged, I can’t help but imagine doing these things with our kids someday.

I also think I’ll add this beef stew to our little tradition. After schlepping an Evergreen up a flight of stairs, finagling it into a temperamental stand and scooping up needles from the weirdest of places (I swear I found a few in the fridge), we deserve some good old-fashioned comfort food. Between the wine and the bacon, this meal is a gift all its own.

Beef Stew
Adapted from The Barefoot Contessa

Ingredients
2 ½ lbs good quality beef cut in 1 ¼-inch cubes (buy it pre-cut at the butcher or grocery store)
1 bottle of good Cabernet Sauvignon
3 whole garlic cloves, smashed
3 bay leaves
6 oz. bacon, cut into 1-inch pieces
1 ½ C. All-purpose flour, plus another 2 Tbs for later
Kosher salt
Black pepper
Olive oil
2 C. chopped yellow onions
1 lb carrots, peeled and cut into 1 ½-inch chunks
1 1lb small potatoes, halved or quartered
1 14 oz. can of beef stock
1 large branch of fresh rosemary
2 Tbs Worcestershire sauce
1 10-oz package frozen peas

Place the beef in a bowl with the whole garlic cloves and bay leaves, and pour the entire bottle of wine over it. Marinate in the fridge for one hour (Note: the longer you marinate, the more flavor the stew will have. But I find an hour does the trick).

Preheat the oven to 300 degrees. Brown the bacon in a large sauté pan for 5 to 7 minutes over medium-low heat. With a slotted spoon, transfer the bacon to a Dutch oven. Combine the flour with 1 Tbs salt and 2 tsp pepper. Lift the beef out of the marinade, and discard the bay leaves and garlic but reserve the liquid. In batches, dredge the cubes of beef in the flour mixture and shake off the excess.

In the sauté pan, brown half the beef over medium heat for 5 to 7 minutes, turning to brown evenly. Place the beef in the Dutch oven with the bacon and continue to brown the remaining beef, placing it all in the Dutch oven.

Lower the heat in the sauté pan to medium-low, add the onions and cook for 5 minutes. Add the minced garlic and cook for 1 more minute. Add the carrots and potatoes and cook for 5 more minutes, stirring occasionally. Place all the vegetables in the Dutch oven with the beef. Add 2 ½ C of the reserved marinade to the sauté pan and discard the rest. Cook over high heat to deglaze the bottom of the pan, scraping up all the brown bits wih a wooden spoon.

Add the beef stock, rosemary, Worcestershire sauce, 1 Tbs salt and 2 tsp pepper. Pour the sauce over the meat and vegetables in the Dutch oven and bring it to a simmer over medium heat on top of the stove. Cover the pot and place it in the over for 2 hours, until the meat and vegetables are all tender, stirring once after 1 hour. If the stew is boiling rather than simmering, lower the heat to 275 degrees.

When the stew is done and the meat is tender, whisk 2 Tbs of the flour and 1 C. of the sauce together and pour it back into the stew. Simmer for 3 minutes, until thickened. Stir in the frozen peas, season to taste and serve hot.

The stew is best enjoyed with a crackling fire and a freshly decorated Christmas tree.

Friday, December 2, 2011

One thing that remains the same.


Greetings! I hope everyone had a beautiful, delicious Thanksgiving. The weeks surrounding Thanksgiving and Christmas are among my favorite of the year. Spirits are a bit brighter, people are kinder to each other and there's this amazing feeling of hope in the air.

In our house, holiday menus change and guests come and go, but one thing that remains the same are my brother Michael’s southern biscuits.

My family cooks everything in an ancient Chamber stove. We light it with a match, and it’s miniscule by today’s GE standards, but it’s the world’s finest mechanism for roasting chicken and baking cookies.

Mike’s biscuits are the last things to go in the oven. Stomachs may rumble and side dishes may cool, but these biscuits are always worth the wait. Golden and fluffy, they’re excellent dipped in gravy, slathered in butter or nestled between turkey and cranberry sauce. Toasted and topped with raspberry jam, they’re wonderful for breakfast, too. Holidays in the Kutner household just wouldn’t be the same without them.

Michael’s Southern Biscuits

Adapted from Alton Brown’s recipe

Ingredients
2 C. flour
4 tsp baking powder
1/4 tsp baking soda
3/4 tsp salt
2 Tbs cold butter
2 Tbs shortening
1 C. buttermilk, chilled (if you don’t have buttermilk, add a Tbs of lemon juice to whole milk)

Preheat oven to 450 degrees. In a large mixing bowl, combine flour, baking powder, baking soda and salt. Using your fingertips, rub butter and shortening into dry ingredients until mixture starts to crumble. (The faster the better, because you don't want the fats to melt.)

Make a well in the center of the dough and pour in the chilled buttermilk. Stir just until the dough comes together—it will be very sticky. Turn dough onto floured surface, dust top with flour and gently fold dough over on itself 5 or 6 times. Press into a 1-inch thick round. Cut out biscuits with a 2-inch cookie cutter, being sure to push straight down through the dough.

Place biscuits on baking sheet so that they just touch. Reform scrap dough, working it as little as possible and continue cutting. Biscuits from the second pass won’t be quite as light as those from the first, but what can you do?

Bake until biscuits are tall and light gold on top, 15 to 20 minutes.

Monday, November 14, 2011

Sunday Soups

I’m making a point to carve out a couple hours every Sunday to make soup. There’s something about a warm bowl of anything that makes the Sunday blues a bit easier to bear. Moreover, a big pot of soup makes for five weekday lunches (and it always tastes better the next day). So who’s with me?


I first discovered Portuguese caldo verde soup at Ted and Amy’s Supper Club. Loaded with potatoes, linguica sausage and kale (Yay! Kale!), this rich, spicy soup makes a comforting meal when served with a glass of red wine and some hot, crusty bread.

Best of all, it takes under an hour to make. I was amazed by how simple it was to replicate. I find that it’s easier to get your hands on Chorizo than linguica sausage, and it worked very nicely here. My aunt--and cooking mentor--who taught me how to make this, has always raved about the power of tap water when it comes to good broth (when she doesn’t have homemade stock on hand, she’ll always use water over the boxed variety). This was the first time I made a soup without stock, and the results were lovely. The salt, onions and chorizo are the star flavors, and give the broth a real heartiness. So when in doubt, turn to the tap.

Caldo Verde soup
Ingredients
3 Tbs olive oil
¾ lb kale, stems discarded and cut into strips
1 large onion, finely chopped
1 ½ lbs boiling potatoes (2 large), peeled and thinly sliced
2 tsp salt, divided
½ lb spicy Chorizo, cut into ½-inch cubes
8 c. water

Heat olive oil in a 5-quart pot over medium-high heat, and sauté onions until translucent (about five minutes). Add peeled potatoes, and cook four to five minutes. When the warm-onion-and-potatoes aroma fills the kitchen, add 8 cups of water, 1 tsp of salt, cover and bring to a boil. Simmer the broth for fifteen minutes, uncovered, and get to work on the chorizo. Heat a small pan over medium-high heat and brown the Chorizo pieces until crisp (five minutes). Lay on a paper towel to drain. After fifteen minutes, mash potatoes—a wooden spoon works fine—into coarse pieces. Place the Chorizo into the soup, and simmer five minutes more. Then place kale in the pot, and use a wooden spoon (gently) to immerse it in the broth. Add additional tsp of salt, stir and simmer for five minutes more.

Friday, April 15, 2011

TGIF

Brunch has always been my favorite meal, because it's so many things wrapped into one: breakfast and lunch, a reason to drink cocktails during the day, and most importantly, a chance to catch up with good friends.

One of the reasons I love the warm weather is because it means lots of brunches at outdoor restaurants, like this one. NYC comes alive at the first signs of Spring, and I intend to celebrate every ray of sunshine with bacon, eggs, and a stiff Bloody Mary. Here are some of my favorite brunch treats. If you're feeling domestic, try the recipe for orange and ricotta breakfast dumplings after the photo jump.

Croissants dunked in coffee


Tea with Brooklyn Honey


McClure's Bloody Mary mix with chipotle vodka


Egg sandwich with homemade sausage from Mile End


Orange Ricotta Breakfast Dumplings
Courtesy of Crumpets and Cakes

Ingredients
1 C ricotta cheese
1 C all purpose flour, divided in half
1 medium egg lightly beaten
1 tsp orange zest plus more for garnish

In a medium pot bring to a gentle boil 2 quarts of lightly salted water. In a large bowl mix the ricotta with the egg, add half the flour, and mix it with a spoon to form it into a ball. Add orange zest and more flour--little by little--as needed. The dough will be very sticky, but not wet, and the amount of flour you use will depend on how much moisture is in the ricotta cheese. One cup should be right, so don’t add too much flour as it toughens the dumpling.

Transfer the dough to a lightly floured surface and cut in half. With your palms, gently roll it into two long strands about 1/2 an inch thick. With a knife, slice each strand on diagonal into about half inch wide dumplings. This will make approximately 44 dumplings. Transfer all the dumplings to a large pot and boil until they float to the surface, about 10 minutes.

Arrange cooked dumplings on a serving platter or divide into small bowls. Top with butter and orange zest, and serve immediately.

Tuesday, April 12, 2011

A Special Story for New Yorkers: 19 Charles Street

Let's be honest: shopping for good food in New York can be a pain. As much as I love going from specialty store to specialty store on the weekends, it would be nice to get my bread, cheese, pasta and meat in the same place every now and then (especially on week days, when the last thing I want to do is shop for groceries).

Enter 19 Charles Street, the Manhattan-based gourmet food delivery service that brings great ingredients and nourishing recipes to your doorstep. This genius new company has a special place in my heart, as it was founded by my lovely friend, Dawn, and her husband Brandon. I remember when 19 Charles Street was just an idea, and I'm thrilled to see all the success it's having.

The idea is simple: 19 Charles Street delivers delicious, high-quality food to people who love to cook but simply don't have the time to shop. They work closely with local farms and gourmet purveyors (like Murray's Cheese, Blue Ribbon Bakery and Raffetto's) so that customers get top-notch recipes with some of the best food available. You can also purchase tasty extras on the site, like alessi sea salt and organic olive oil. I know--genius.

To order, simply sign up, browse the current week's menu, select your servings and when you want to get cooking. The order will be delivered to your doorstep the following week (Monday-Wednesday). Each meal comes with a recipe card and all the required ingredients. Best of all, nothing takes longer than an hour to prepare.

I loved making their baked breaded chicken with collard greens and a turnip puree. 19 Charles Street has taken the guesswork out of creating a gourmet meal, and most importantly, they are super responsible about the food they provide.

As of now, 19 Charles Street delivers throughout Manhattan and to most parts of Brooklyn. But I sense they'll soon be taking the country by storm.

Here's a peek at this week's menu:

Braised chicken breast with rainbow chard, crimini mushrooms and pan-fried sunchokes


Sausage risotto with baby broccoli rabe and Parmesan


Lightly breaded filet of sole with toasted pine nuts, spring onions and green salad


Croque monsieur mac & cheese with a green salad

Monday, April 11, 2011

Pasta with Shrimp and Arugula


Pasta is one of my favorite things to cook, both for its possibilities and for all the meals I can get out of it. It's easy to get one dinner and three lunches out of a pound of pasta, which makes it one of the most cost-effective foods ever. And if you can find a pasta recipe that only takes a half an hour to make, well that's a bonus.

I got this easy recipe for pasta with shrimp and arugula from my friend Sabrina, an Italian girl who knows her pasta. Sabrina adapted it from another Italian girl who knows her pasta. When you get a recipe from an Italian who likes to cook, you know you can trust it. This dish is so good, I had to step away from my plate and fork. I could have easily finished the entire pot.

If you sub whole wheat noodles for white-flour pasta, this meal is crazy-healthy.

Whole Wheat Pasta with Shrimp and Arugula

Ingredients
1/4 C olive oil
1 finely chopped shallot
1 Tbs minced garlic
1/2 tsp crushed red pepper flakes, plus more serving
1 C dry white wine
1 lb large shrimp, peeled and de-veined. Do yourself a favor and buy a bag of frozen, peeled and de-veined shrimp.
12 oz whole wheat pasta (I like wide noodles, but spaghetti, linguine, or whatever you prefer works just fine)
3 C (packed) fresh arugula

Heat the oil in a heavy large skillet over medium heat. Add the shallots and garlic and saute until translucent, about 2 minutes. Add the red pepper flakes and white wine and bring to a simmer. Simmer until the wine reduces by half, about 5 minutes. Add the shrimp and cook just until they are pink, about 2 minutes (5, if frozen).

Meanwhile, cook the pasta in a large pot of boiling salted water until just tender but still firm to the bite, stirring occasionally. Note: whole wheat pasta is reaches a nice al dente after 6 minutes. If you're using white pasta, cook for 8 to 10 minutes.

Drain the pasta, and return to pot. Add the shrimp in its sauce, plus the arugula, to the pot. Toss to combine. Season the pasta with salt and pepper, red pepper flakes and a squeeze of lemon juice (optional).

Friday, April 8, 2011

TGIF

I always find something to love at flea markets, from vintage fur coats to old grammar-school maps. But I love the Brooklyn Flea for one very specific reason: the food. It's as if the vendors put everything I love to eat in one place. There are lobster rolls, homemade caramels, artisanal sodas, cheese and jam....I could go on and on. Browsing the Flea is one of my favorite Sunday afternoon activities. This year, the Flea has a new home on the Williamsburg waterfront--and the food alone is worth a trip on the L train.

Here are some of my favorite locally-made treats:

Hot Dogs with kimchi apples, pickled carrots and daikon from Asia Dog NYC


Liddabit Beer & Pretzel caramels (made with Brooklyn Lager)


Strawberry-basil popsicles from People Pops


Perfect half-sour pickles from McClure's


Lobster rolls with a touch of mayo and celery from The Red Hook Lobster Pound


Open Sundays from 10 a.m. to 5 p.m.; 27 North Sixth St. (between Kent Ave. and the East River); brooklynflea.com

Have a delicious weekend.

Thursday, April 7, 2011

China Girl

I can't get enough of this porcelain flatware by Scottish artist Caroline Swift. Her collection is almost too lovely to eat off of, though it's perfectly safe to.

Just looking at these bowls makes me think of excuses to throw a dinner party:


These egg cups look like something Jane Eyre and Mr. Rochester would have used at the breakfast table:


And I love the details in these spoons:


What I find most interesting about this collection is that Swift, who's based in Spain, has her clay imported in vats of British water. Apparently, British water is softer than Spanish water, and yields more delicate porcelain. It's a more costly process to be sure, but I think it works for her.


All pieces ship from Spain and are priced in British Pounds Sterling.

Images courtesy of Caroline Swift.

Wednesday, April 6, 2011

Jam On

These days, I'm all about cooking classes (and pretending it's summer). A couple weeks ago I took a jam-making class with the wonderful Laena McCarthy, founder of artisanal jam company Anarchy in a Jar. I've been a fan of Laena's jam ever since I stumbled upon it at the Brooklyn Flea (where, it must be said, I find all my favorite foods).


I love Laena's jam for its unexpected elements, like balsamic, mint and peppercorns. She also has great suggestions for pairing her creations with other food (hot pepper jelly on grilled cheese, or fig jam on pizza, for example). Laena's vendors include Williams-Sonoma and Whole Foods, and she personally delivers her jams by bicycle to Brooklyn customers (could she be any cuter?).

Luckily, she's sharing her secrets with the rest of us in the form of small, hands-on classes. Students learn the basics of jam-making, including how to pour the perfect jar and where to buy the best local organic fruit. This is a roll-up-your-sleeves-and-get-cracking kind of environment: we mashed the fruit, added the sugar, stirred the pot and sealed the jars. We also got to take our jam home, and I enjoyed mine on toasted croissants for weeks.


After taking Laena's class, I am a firm believer than anyone can--and should--make their own jam. The process of fruit to jar is so simple, yet there's nothing more special than giving someone a jar of homemade preserves. Laena was kind enough to share her recipe for the strawberry mint jam we made in class, and I promise it's as easy as it looks.

These classes are a wonderful opportunity to learn the basics of traditional jam-making, while experimenting with different flavors. But be forewarned: once you take her class, you'll want to spend all your free time foraging for berries.


Strawberry Jam with Mint & Pepper

A note on jars: you can buy them at any cooking store, but they're much cheaper at hardware stores.

This strawberry jam tastes like pure strawberries because we used fresh-picked berries. And instead of commercial, artificial pectin, we used Pomona’s Universal Pectin. Pomona’s is an all natural pectin that doesn’t require sugar to jell, so jams and jellies can be made with less, little, or no sugar (stevia, honey, etc can also be used as sweetener, but you'll need to adjust your measurements from the ones below).

You can buy Pomona’s online, in many health food stores, and in Brooklyn at the lovely Brooklyn Kitchen.

Ingredients
4 C mashed strawberries
2 C sugar
2 tsp calcium water (this comes in the Pomona's Pectin packet)
2 tsp pectin
2 tsp lemon juice
2 tsp chopped mint
1/4 tsp ground peppercorns

Remove strawberry stems and wash. Lightly mash with a potato masher (this works best), wooden spoon or hands--but beware, the acid can cause a rash on your skin.

Now, make the calcium water: Put 1/2 tsp white calcium powder and 1/2C water in a small, clear jar with lid. Store in refrigerator between uses. Note: calcium water lasts a number of months, but discard if the settled white powder discolors. Also, always shake well before using.

Once the calcium water is prepared, wash and rinse your jars and let stand in hot water. Bring lids and rings to a rolling boil (you should be able to hear them making a racket in the pot), turn down heat and let stand in hot water. Reserve this pot of water, because you'll need to boil the jars again once they're full of jam.

Meanwhile, prepare the berries. Pour them into a stainless steel pot (or
Le Crusseut, or copper if you are so lucky) and squeeze lemon juice over them. Add 2 tsp calcium water into pan and stir well.

Measure sugar into separate bowl and thoroughly mix proper amount of pectin powder sugar. Bring berries to a boil. They'll start to foam, and you'll want to skim this foam off the top and discard it. Add your mixed pectin sugar and stir vigorously for 1-2 minutes, until pectin fully dissolves.

Return berries to a boil and remove from heat. Skim off any remaining foam that has formed at the top. Add mint leaves and ground peppercorns and stir to incorporate.

Fill jars almost to the top, wipe the rims clean and screw on the 2-piece lids. Bring the same pot of water you used to sterilize the jars back to a boil. Place filled jars in the pot of boiling water, and cover. Boil 10 minutes. Remove from water, and let jars cool. It's very important to make sure the seals of the lids are sucked down. Some jars take a bit more time to do this than others, but they should all seal within a few moments of being removed from the boiling water.

Jam lasts one to two months once opened.

Note: Pectin completes its jell when thoroughly cool.

Recipe and images courtesy of Anarchy in a Jar.

Tuesday, April 5, 2011

The Slate of Things


It's the first warm day we've had for a long while here in NYC (I daresay it might be time to retire my black tights). Balmy days like this remind me that picnic season is right around the corner. These gorgeous slate cheese boards and coasters from Brooklyn Slate are perfect for outdoor meals in the park.


Brooklyn Slate's collections remind me that the best things come in simple packages. The owners hand-make every unique piece in their Gowanus studio, and source their material from a private quarry in upstate NY.

There's nothing better on a warm day than good food and something lovely to serve it on. Also, every item comes beautifully wrapped in a brown paper package tied up with string (seriously).


The company just launched a new garden collection for spring, which makes me long for a backyard to plant herbs in. Until then, I'll be gifting these slate seedling markers to my friends who are lucky enough to have their own patches of green.


Don't want to go to Brooklyn to pick up your slate? Check out their list of stockists. If you live near Murray's Cheese, you can pick up your lunch and your serving board in one fell swoop.


Images courtesy of Brooklyn Slate

Monday, April 4, 2011

Enchilada Sunday

I may have enough cookbooks to fill a small bookstore, but I'll always believe that the best recipes come from moms. While I love to cook in-depth dishes from time to time, by and large I prefer a dish with easy ingredients that's on my table sooner than later. And that's what mom recipes are all about.

A shining example of a great mom meal is my friend Courtney's chicken enchilada recipe. Her mother has been making these for years, and they are the definition of comfort food. We had a little Mexican-themed dinner party last week, and they were the highlight of the meal (well, these and a couple strong Margaritas). Serve them with chips, salsa and re-fried beans, and you've got yourself a fiesta.

Not only are these enchiladas simple and delicious, they are also the best thing to eat on Sunday nights, when the end-of-the-weekend blues sets in.


Every mom has a few signature recipes up her sleeve (my mom has chili and popovers). I'd love to hear your favorites!

Sour Cream Chicken Enchiladas

Ingredients
1/2 C chopped onion
1/2 Tsp garlic powder
1 C sour cream, divided
2 C cooked chicken, chopped
1 1/2-2 C shredded cheddar cheese (or a blend of cheeses, like Monterey Jack, Manchego and cheddar)
1/4 C milk (whole or skim is fine)
1 can cream of chicken soup (I like Campbell's)
1 4-oz can chopped green chilies
8 7" flour tortillas

Preheat oven to 350 degrees. Mix onion, garlic, soup, 1/2 C sour cream, and green chilies. Reserve 3/4 c of this mixture in a separate bowl. Stir chicken and 1/2 C cheese into remaining sauce. In a small bowl, combine the 3/4 C sauce with remaining sour cream and milk, and blend well.
Spread 1/2 C from 3/4 sauce over bottom of a 9x13 baking dish. Place 1/4 C of chicken mixture in the center of each tortilla and roll up. Place seam side down in baking dish when all are filled.
Spoon remaining sauce over top, cover with foil, and bake for 20 minutes. Remove pan from oven, sprinkle remaining cheese on top and bake for another five minutes (or until the cheese is melted and bubbling). Let enchiladas stand for for five minutes. Serve with salsa.

Friday, April 1, 2011

TGIF

What better way to start the weekend than with a cupcake? Last week, my friend Brittany and I took a cupcake-making class at the delightful Butter Lane (whose cupcakes are my new favorite in the city).

While cupcakes aren't that complicated to make, we learned a lot: for example, it's totally possible--and easy--to over mix, and when you do, you end up with bread, not cake. Buttermilk (and sometimes, sour cream) is the secret ingredient to moist, tasty cupcakes. It adds an unexpected tang and sweetness. Lastly, baking is always more fun with a cocktail.

Sign up for a class here.


My favorite things about Butter Lane are the $1 frosting shots. They have tons of tempting flavors, like raspberry, Tiramisu and cinnamon cream cheese (which, when topped on a banana cupcake, tastes just like French Toast).


Here's the recipe for their signature vanilla cupcakes and vanilla frosting. Happy Friday!

Butter Lane Vanilla Cupcakes
Ingredients
1/2 lb unsalted butter (we used Cabot)
2 1/2 C granulated sugar
5 eggs
Generous splash of vanilla extract
12 oz sour cream
1 Tbs baking powder
1 pinch of salt
3 C cake flour (I like the King Arthur brand)

Preheat oven to 300 degrees. Combine butter and sugar in a mixing bowl. Mix on medium speed until butter and sugar form a cream. Crack eggs into a separate bowl, add vanilla extract to the eggs, and then add eggs to the mixing bowl one at a time. Mix on medium speed until batter becomes light and fluffy. Combine baking powder and salt with flour. Add half of the flour mixture, followed by sour cream, and then add the rest of the flour mixture. Mix until combined, but be careful not to over mix. Scoop cupcakes into a lined muffin tin and bake for 23-25 minutes.

Yields 36 cupcakes


Butter Lane Vanilla Frosting

Ingredients
1 lb of butter
4 oz cream cheese
7 C confectioner's sugar
1 vanilla bean
1 splash vanilla extract

Combine butter and cream cheese in mixing bowl and mix on a medium speed for 5 minutes. Add vanilla bean and mix for one minute. Turn mixer to low and add sugar. Once combined, add a splash of vanilla extract and mix on a medium-high speed for 3 minutes or until smooth and fully combined.


Butter Lane, 123 East Seventh Street (btwn 1st and A), NYC; 212.677.2880 or butterlane.com

Images courtesy of Butter Lane.

Thursday, March 31, 2011

Swooning

Museum exhibits in New York are a dime a dozen--so choosing which one to see can be a struggle. Last weekend, my friend Alexis and I went to the Van Cleef & Arpels exhibit at the Cooper Hewitt National Design Museum. Alexis had previously checked it out, and loved it so much that she had to take another peek--and insisted I come along (but really, it wasn't like she had to twist my arm).

I'm so glad I went. Not only are the gems gorgeous pieces of art, but the craftsmanship behind them is jaw-dropping. And if you're a fashion-lover, like me, this exhibit is far more rewarding than looking at a collection of paintings. Some of the most beautiful women of the 20th century have owned Van Cleef & Arpels pieces, including Daisy Fellowes, the Duchess of Windsor, and the late, great Elizabeth Taylor.

If you're in the NY area, I highly recommend checking it out. The exhibit runs through June 5. Here's a small sampling of the goods on display:

Images courtesy of Cooper Hewitt National Design Museum


Cooper Hewitt National Design Museum, 2 E. 91st St (at Fifth Ave.), NYC

Wednesday, March 30, 2011

A Simple Sauce

What is it about tomato sauce? It's so seemingly simple, yet so hard to get just right. I'm in awe of those old-school Italian women who wake up early on Sunday, go to church, and spend the rest of the day making sauce. While I'll never be that kind of woman, Mario Batali's Bolognese sauce at least lets me pretend that I am. It's absolutely delicious and virtually impossible to mess up. It's the kind of sauce I want to call "gravy" (hearty, filling and all sorts of comforting).


Bolognese sauce can be spooned over any sort of pasta, but I like it with a thick pappardelle. Trader Joe's makes a lovely lemon and peppercorn version.

And of course, Pepperidge Farm garlic bread is encouraged.

This recipe calls for a pound of ground veal and a pound of ground pork. I recommend going to a butcher, who will grind and combine it fresh. Quality, fresh meat makes a big difference.

Perfect Bolognese Sauce
Adapted from Mario Batali


2 medium onions, finely chopped
4 celery ribs, finely chopped
2 medium carrots, finely chopped
5 garlic cloves, thinly sliced
1/4 c extra-virgin olive oil
1/4 lb pancetta, finely chopped (bacon also works here)
1 pound ground veal
1 pound ground pork (not lean)
1 6 oz. can tomato paste
1 c whole milk
1 c dry white wine (something you would want to drink)
1 c water
1 tsp fresh thyme leaves
1 1/4 tsp kosher salt
1/2 tsp black pepper

Heat oil in a 6-to-8-quart heavy pot over moderate heat. Add onions, celery, carrot, and garlic, stirring occasionally, until softened (about 5 minutes).

Add pancetta, veal, and pork and cook over moderately high heat, stirring and breaking up lumps with a wooden spoon, until nicely browned and no longer pink (about 6 minutes).

Stir in tomato paste, milk, wine, water, and thyme and gently simmer, covered, until sauce is thickened, 1 to 1 1/2 hours. The longer the sauce simmers, the more it thickens--and the better it tastes. If you can, let the sauce simmer for 3 to 4 hours. Add salt and pepper and remove from heat.

This sauce can be made up to 2 days ahead. Cool, uncovered, before chilling in the fridge. Frozen, it keeps for about a month.

Monday, March 28, 2011

A New Day

It's funny how time flies. One minute it's Christmas, and then all of a sudden, it's Spring (well, in theory at least. It's still frigid in NY). So much has happened within the last couple months. Most importantly, I got a new job, and that has got me thinking about change.

I like to think of this blog as an ever-evolving little world. While cooking is and always will be a huge passion of mine, there are so many other things I love (from fashion and art to travel and photography). I want to share all of that with you guys. And so, I've decided to talk about it all right here, in this space. I'll still be cooking as much as possible, but I'll also be writing about a new jewelry line I've found, or an exhibit that has inspired me. I hope you'll be inspired, too.

So let's begin. One of my favorite discoveries as of late is Paste SF. I stumbled upon this adorable art at a store called Paper Trail, upstate in Rhinebeck, NY (I highly recommend a weekend trip to this charming town, by the way, and I recommend you stay here and eat here).


Working with vintage books and newspapers, artist Denise Fiedler renders printed collages of food, fashion, puppies, you name it. I was particularly taken with this cake, and now have a framed version in my kitchen for inspiration:


Check out Denise's site. She also makes custom prints, which are perfect gifts for wedding or showers.

Thursday, January 20, 2011

Pumpkin Cake


My best friend came home to snowy New York over the holidays. I always look forward to Karen’s tales of life in LaLa land, especially in the winter. Her stories somehow make me feel warmer. When you’ve been friends with someone since you were six years old, you pretty much know everything about them. Well, Karen surprised me during her visit. She happens to have a killer pumpkin cake recipe up her sleeve. Why I am only finding out about this perfect cake after twenty years is anybody’s guess. Lucky for me, I had an opportunity to try it over Christmas when I was visiting Karen’s family. Sheryl Chuzmir (Karen’s mom) has been making pumpkin cake for years and years. Again, why I am only finding out about it now is anybody’s guess. Happily, Sheryl gave me the recipe (and a few others, which I can’t wait to try). Let me tell you: this cake is good.

I love a recipe with history, the kind that is passed from one person to another because it is just that good. And when it’s a cinch to make, that’s the icing on the cake (forgive the pun). I’m certain this recipe originated from a cookbook that holds a cherished place on someone’s shelf, and is frayed at the edges from years of use. But I sort of love that its origins are unknown. I feel the same way when I find a great book left behind on an airplane, or a dollar bill with a handwritten message on it.


But back to cake. Pumpkin is such a versatile ingredient: it does the work of eggs, it’s sweet and decadent but not overly so, and most importantly, it has an element of surprise. You can barely taste the pumpkin in this cake, yet it’s doing all the work. It turns the batter a beautiful shade or orange which then turns amber in the oven. It’s also what keeps the cake moist after a week. The flavor is subtle, and its sweetness is enhanced by a generous cup of chocolate chips and a sprinkling of confectioner’s sugar right before you serve it. According to Sheryl, Ghirardelli chips are the only acceptable option—and I would take that to heart. This woman knows her pumpkin cake. Whatever you use, make sure you it’s high quality semi-sweet chocolate chips.

Karen made Pumpkin Cake for a game night she hosted at her new apartment. I thought it only appropriate to bake it for the first time at my own game night. The cake may have been the most entertaining part of the evening, aside from our friend acting out Bethenny Frankel in Celebrity. Read all about that game here. I promise it will become your new favorite. And so will Pumpkin Cake.

As far as I’m concerned, there is no situation that cannot be improved by a piece of cake. And if you can share it with your best friend, well, what could be better?

Pumpkin Cake

Ingredients
2 eggs, beaten
1 C canned pumpkin
1 C sugar
¾ C oil (olive or canola will do)
1 ½ C flour
1 Tsp baking powder
1 Tsp baking soda
1 Tsp cinnamon
¼ Tsp salt
1 Tsp vanilla
1 C semi-sweet chocolate chips

Preheat oven to 325 degrees. Beat eggs until frothy. Mix the rest of the ingredients into eggs. You can use a mixer or stir by hand, but if using a mixer, fold in the chocolate chips at the end with a spatula or wooden spoon. Pour batter into a lightly greased bundt pan and bake for 50-60 minutes. Cool and sprinkle with confectioner’s sugar.